French Toast in a Cup

Day 2 of my 7-Day Microwave Mug Challenge! Check out the original recipe here.

I found it a little hard to follow with the directions split up with step-by-step pictures. I love including pictures, but I also like to have all the important parts in one place so I can review the whole process before beginning. I am a nerd.

Ingredients:

  • 2 pieces of bread
  • butter, 1/2 tablespoon
  • 1 egg
  • milk, 3 tablespoons
  • cinnamon, sprinkle
  • vanilla, to taste
  • syrup, if desired

1. Lightly toast the bread and cube into 1-inch pieces. I used two slices of bread, because who just eats one piece of French Toast?

2. Microwave the butter in the mug until melted; slosh around until the inside is coated. Fill the mug with the bread cubes.

3. In a small bowl, combine egg, milk, cinnamon, and vanilla. Pour into mug over the bread pieces. Stir around until they are evenly coated. Microwave for 1 minutes and 20 seconds.

Once again, these people are using Lilliputian-sized coffee mugs.

Staged photo, anyone?

PrudentBaby’s French Toast in a Cup

I’m sorry, but that photo is just too pretty. Nothing comes out of the microwave looking that pretty. Mine certainly didn’t!

ShinyHappyPeebles' French Toast in a Cup

ShinyHappyPeebles’ French Toast in a Cup

Pretty easy recipe with minimal mess — though I would say it turns out more like a bread pudding. I still prefer some crispy on the outside, mushy on the inside, skillet French Toast!

Coffee Cup Quiche

Day 1 of my 7-Day Microwave Mug Challenge! I made a few edits. Check out the original recipe here.

Ingredients:

  • 1 egg
  • 1 1/2 tablespoons milk
  • Salt
  • Black pepper
  • 1/2 Whole Wheat Bagel Thin
  • 2 teaspoons cream cheese
  • 1/2 slice ham
  • Thyme
  • A pinch of Cheddar Cheese

1. Beat egg and milk together with a fork in a coffee cup. Sprinkle with salt and pepper. Tear bagel into dime-size pieces; stir in. Add cream cheese; stir in. Tear ham into small pieces; add to mixture. Sprinkle with thyme.

2. Microwave on high for 1 minute. Garnish with cheddar cheese. Microwave 20 seconds.

Now, I don’t know what kind of miniature coffee mug they used for their picture, but it definitely doesn’t puff up that much!

St. Louis Today's Coffee Cup Quiche

St. Louis Today’s Coffee Cup Quiche

Perhaps my Bagel Thins substitution made a difference in the puffiness? I also substituted cheddar cheese on top for the Dijon mustard, because that’s what I had in my refrigerator! I also used a thick, sugar-glazed Curel ham slice — I don’t usually have fancy-shmancy prosciutto on hand. 😛 Anywho, mine didn’t look as pretty, but it certainly tasted delicious!

ShinyHappyPeebles' Coffee Cup Quiche

ShinyHappyPeebles’ Coffee Cup Quiche

Unfortunately, I took my picture after stirring it up to incorporate all the ooey-gooey cheddar cheese and cream cheese. My stomach got ahead of my camera!

What I really like most about this recipe, other than the simplicity, is the portion size. It was the perfect amount of food to start my morning!

I’m in a Mug!

Unfortunately, my big exciting DIY project for this weekend is on hold due to rain. Lots of rain. And humidity. Spray paint doesn’t do so well in these conditions. 😦

Never fear! Thanks to a post by a Facebook friend, I have been inspired to take on a 7-Day Challenge. Behold! This article lists out 18 microwave snacks you can make in a mug. Anyone remember my Brownie in a Mug post?

Why, oh why, didn’t I stumble across this post in college? C’est la vie! While all of these snacks look delicious, I have selected 7 recipes to try. I will make one a day for the next week with a blog post to report on the outcome.

7-Day Microwave Mug Challenge:

  1. Coffee Cup Quiche
  2. French Toast in a Cup
  3. Banana Bread in a Mug
  4. Mac and Cheese in a Cup
  5. Meatloaf in a Cup
  6. Nutella Mug Cake
  7. Chocolate and Caramel Mug Cake

Who knows — maybe one of these will become a household favorite and find it’s way into my big, red cookbook. 🙂

Big, Red Cookbook

Big, Red Cookbook

St. Patty’s Pancakes

What a perfect reminder about why I started this blog: the little things. You don’t need complicated projects or fancy purchases to make life great. Sometimes, all you need is green food coloring!

St. Patty's Pancakes

St. Patty’s Pancakes

Though my pancake pen skills need some work, I was pretty happy with my little shamrock! 🙂 This was a simple alteration, but it was a fun way to celebrate St. Patrick’s Day!

Shamrock Pancake

It has four distinct leaves. That qualifies as a four-leaf clover!

Plus, the green pancake batter gave me the perfect excuse to pull out my Yoda pancake mold again!

Cake from a pan am I! Delicious covered in syrup am I!

Cake from a pan am I! Delicious covered in syrup am I!

Mini Cinnamon Rolls

Comfort foods are a great thing. Delicious, indulgent, usually nostalgic — they can soothe just about any bad mood or grumbly tummy. What’s even better is comfort food that is easy to make!

Since it has been such a crazy week at work, and I have been especially demanding on several of my co-workers for a big project, I decided to make the office a Friday morning treat! This recipe for Mini Cinnamon Rolls is one of my favorite recipes. It is so simple, and yet such a crowd pleaser. These things disappear FAST!

Here is what you need:

  • 2 cans of Pillsbury Crescent Rolls
  • 6 tablespoons butter, softened
  • 1/3 cup firmly packed brown sugar
  • 1 tsp cinnamon
  • chopped nuts (optional)
  • 2/3 cup powdered sugar
  • 1 tablespoon milk
  • 1/4 tsp vanilla
  • 1/8 tsp salt

Unroll both cans of crescent rolls and separate each sheet of dough along the center perforation to form 4 rectangles. Press the diagonal perforations to seal the triangle pieces together.

Stir together the butter, brown sugar, and cinnamon. Spread this mixture evenly over each rectangle. You can sprinkle chopped nuts over the spread, if you like. Roll the rectangles up like a jelly roll, starting at the long end.

Mini Cinnamon Rolls

Keep the dough cold. It’s easier to work with!

Use a serrated knife to gently slice each “log” into six 1-inch pieces. Use shortening or a spray to grease two 8-inch cake pans. Arrange the rolls about 1/4 inch apart. Bake at 375° for 15 minutes.

Mini Cinnamon Rolls

Ready for the oven!

While the rolls are cooking, stir together the powdered sugar, milk, vanilla, and salt. Drizzle this mixture over the rolls when they get done in the oven! And enjoy the ooey-gooey goodness!

Mini Cinnamon Rolls

Mini Cinnamon Rolls

Just for funsies, I did a batch with Nutella as the filling! Something I saw on … wait for it … Pinterest. Anyway, these Nutella Rolls were less work and equally as delicious. WIN!

Mini Nutella Roll

Mini Nutella Roll

So to make these, you just need the Pillsbury Crescent Rolls, Nutella — and then the powdered sugar, milk, vanilla, and salt to make the glaze!

Pretzel Jello Salad

Happy Valentine’s Day! As a present to my sweetie for an awesome day, I made one of his favorite desserts: Pretzel Jello Salad!

Now, the family recipe I have is for Strawberry Pretzel Jello Salad, but I have created my own version, Peach Pretzel Jello Salad. That’s the wonderful thing about this recipe, though; you can really do any variation of fruit and Jello!

First, get the cream cheese out and put it in a mixing bowl to soften. I always forget to do this! Don’t forget to do this, unless you really enjoy softening the cream cheese by creaming it for five minutes. Hand cramp, anyone?

For the crust, you’ll need:

  • 2 cups crushed pretzel twists
  • 1 and 1/2 sticks butter, melted
  • 1/4 cup sugar

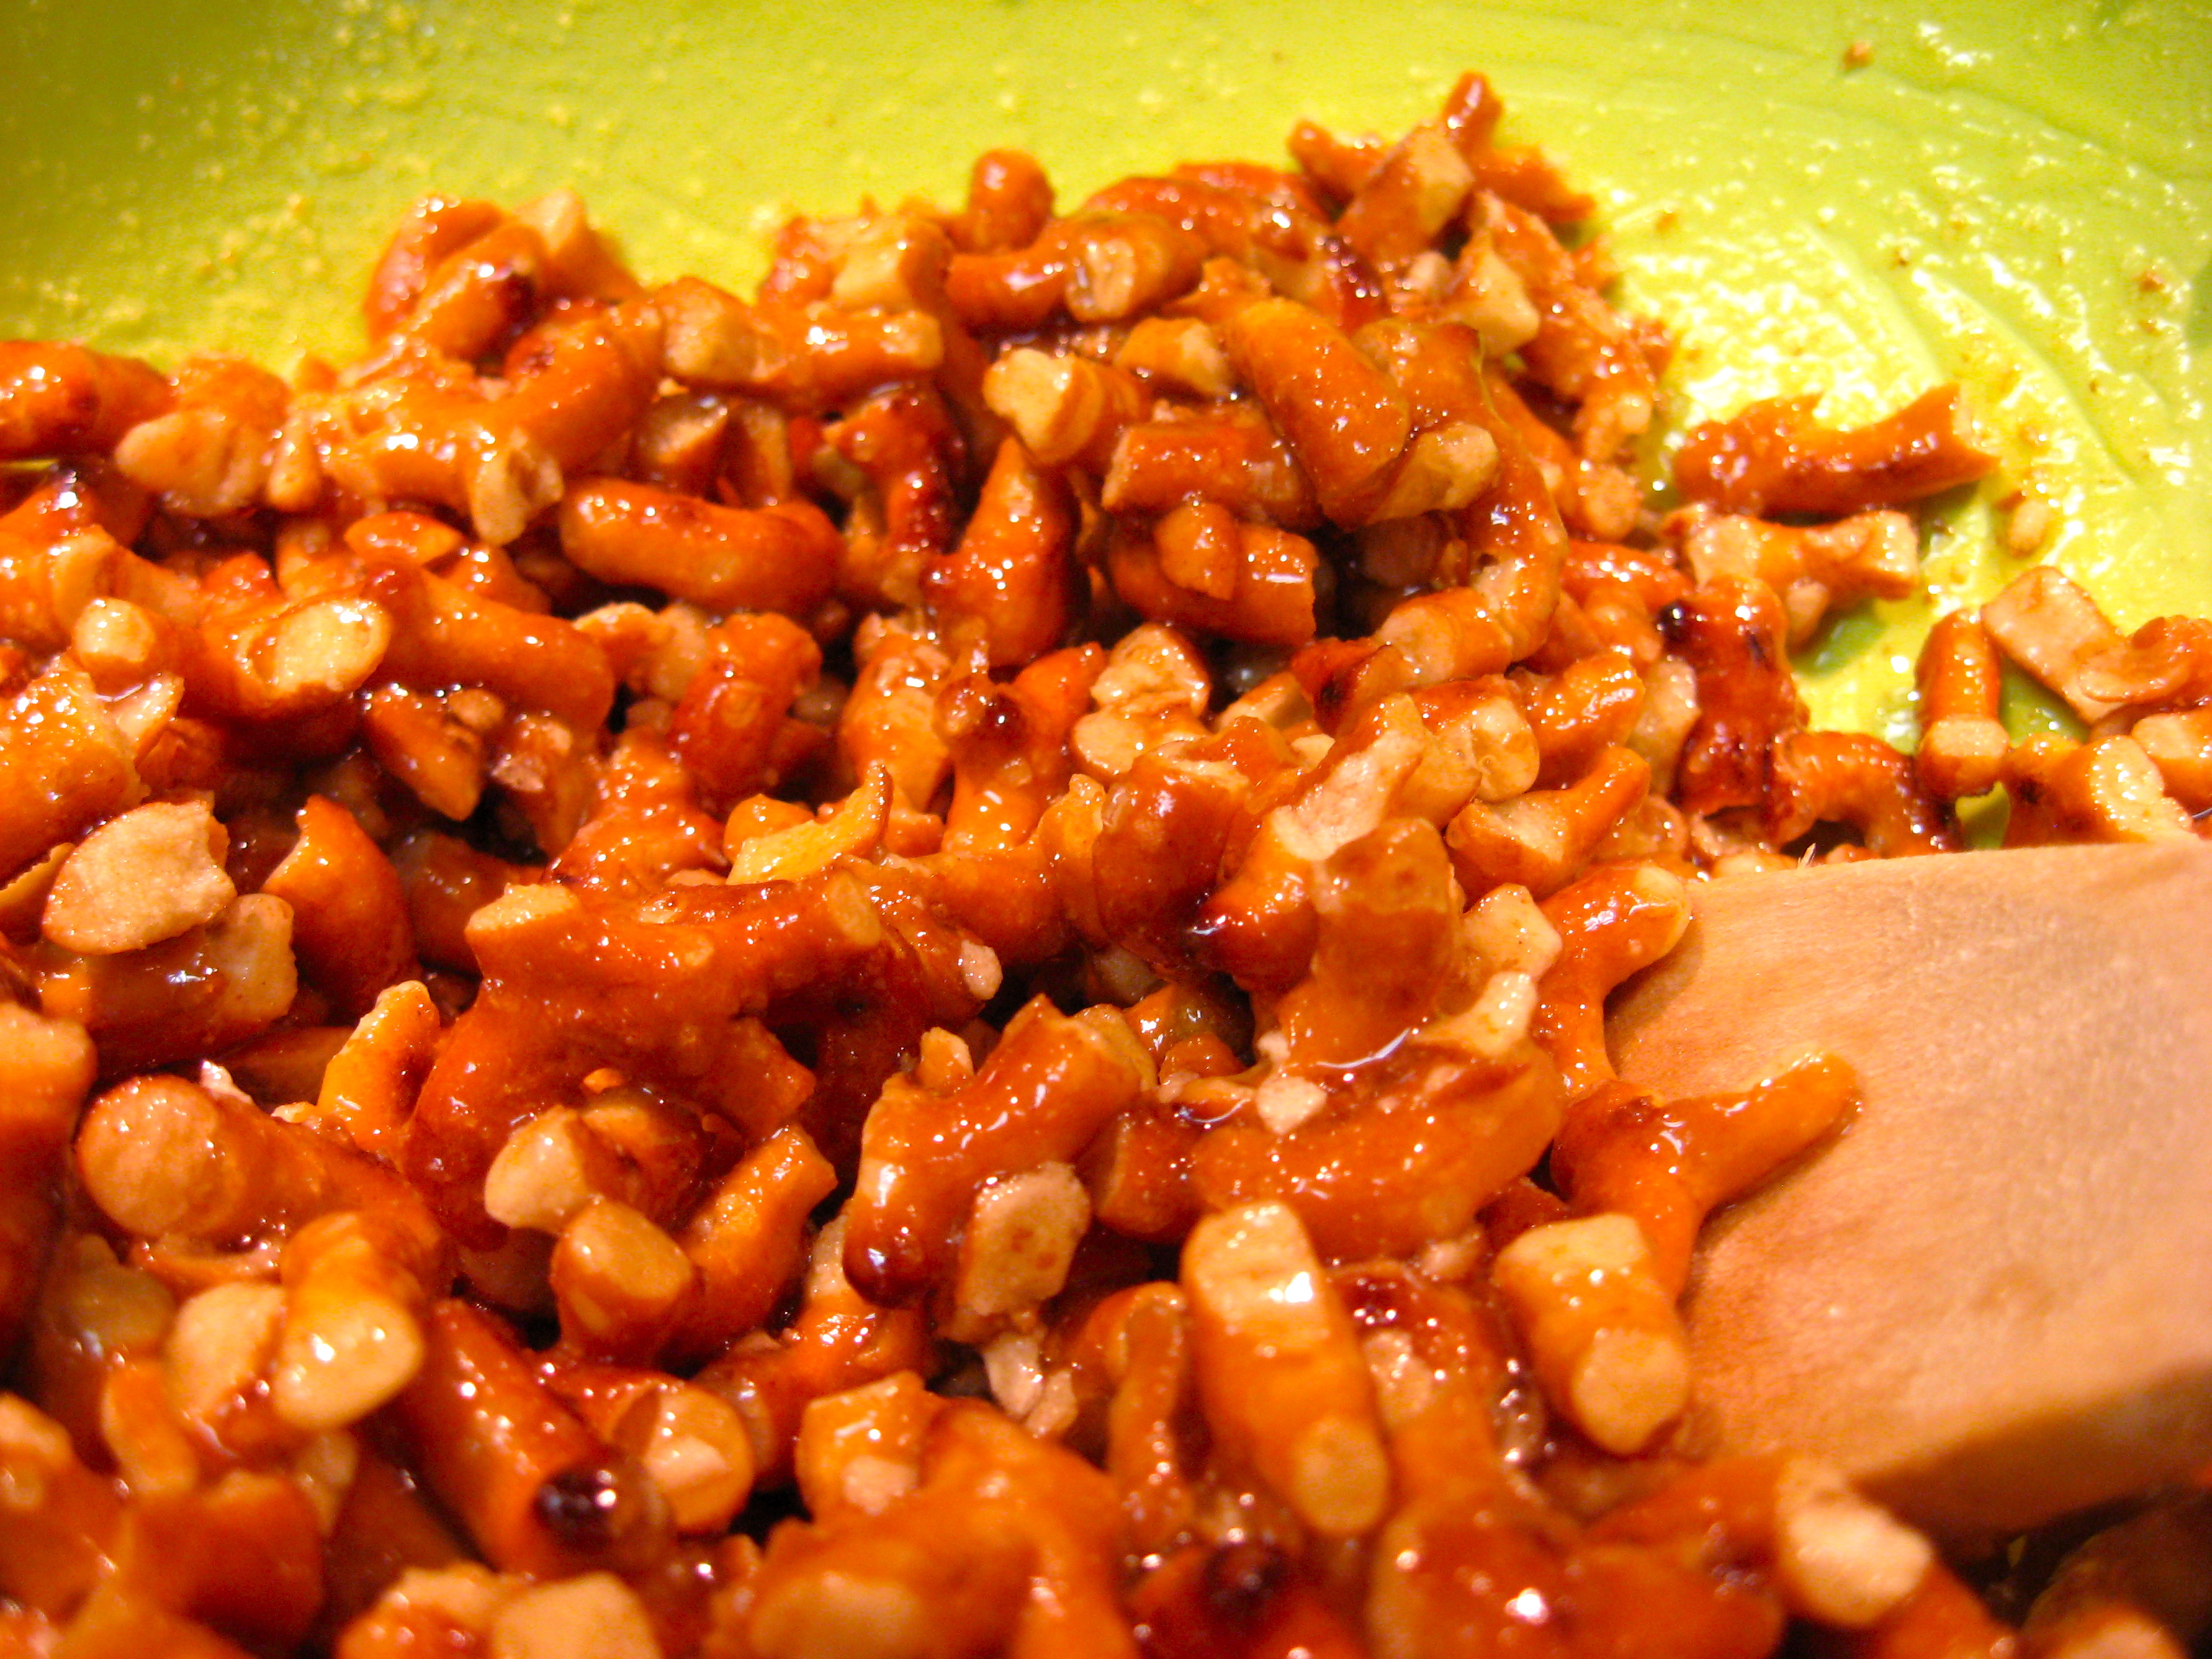
Crush the pretzels into small pieces, add in the sugar, and then pour in the melted butter. Stir until the pretzel pieces are well-coated in sugary goodness.

Sugary Goodness

Sugary Goodness

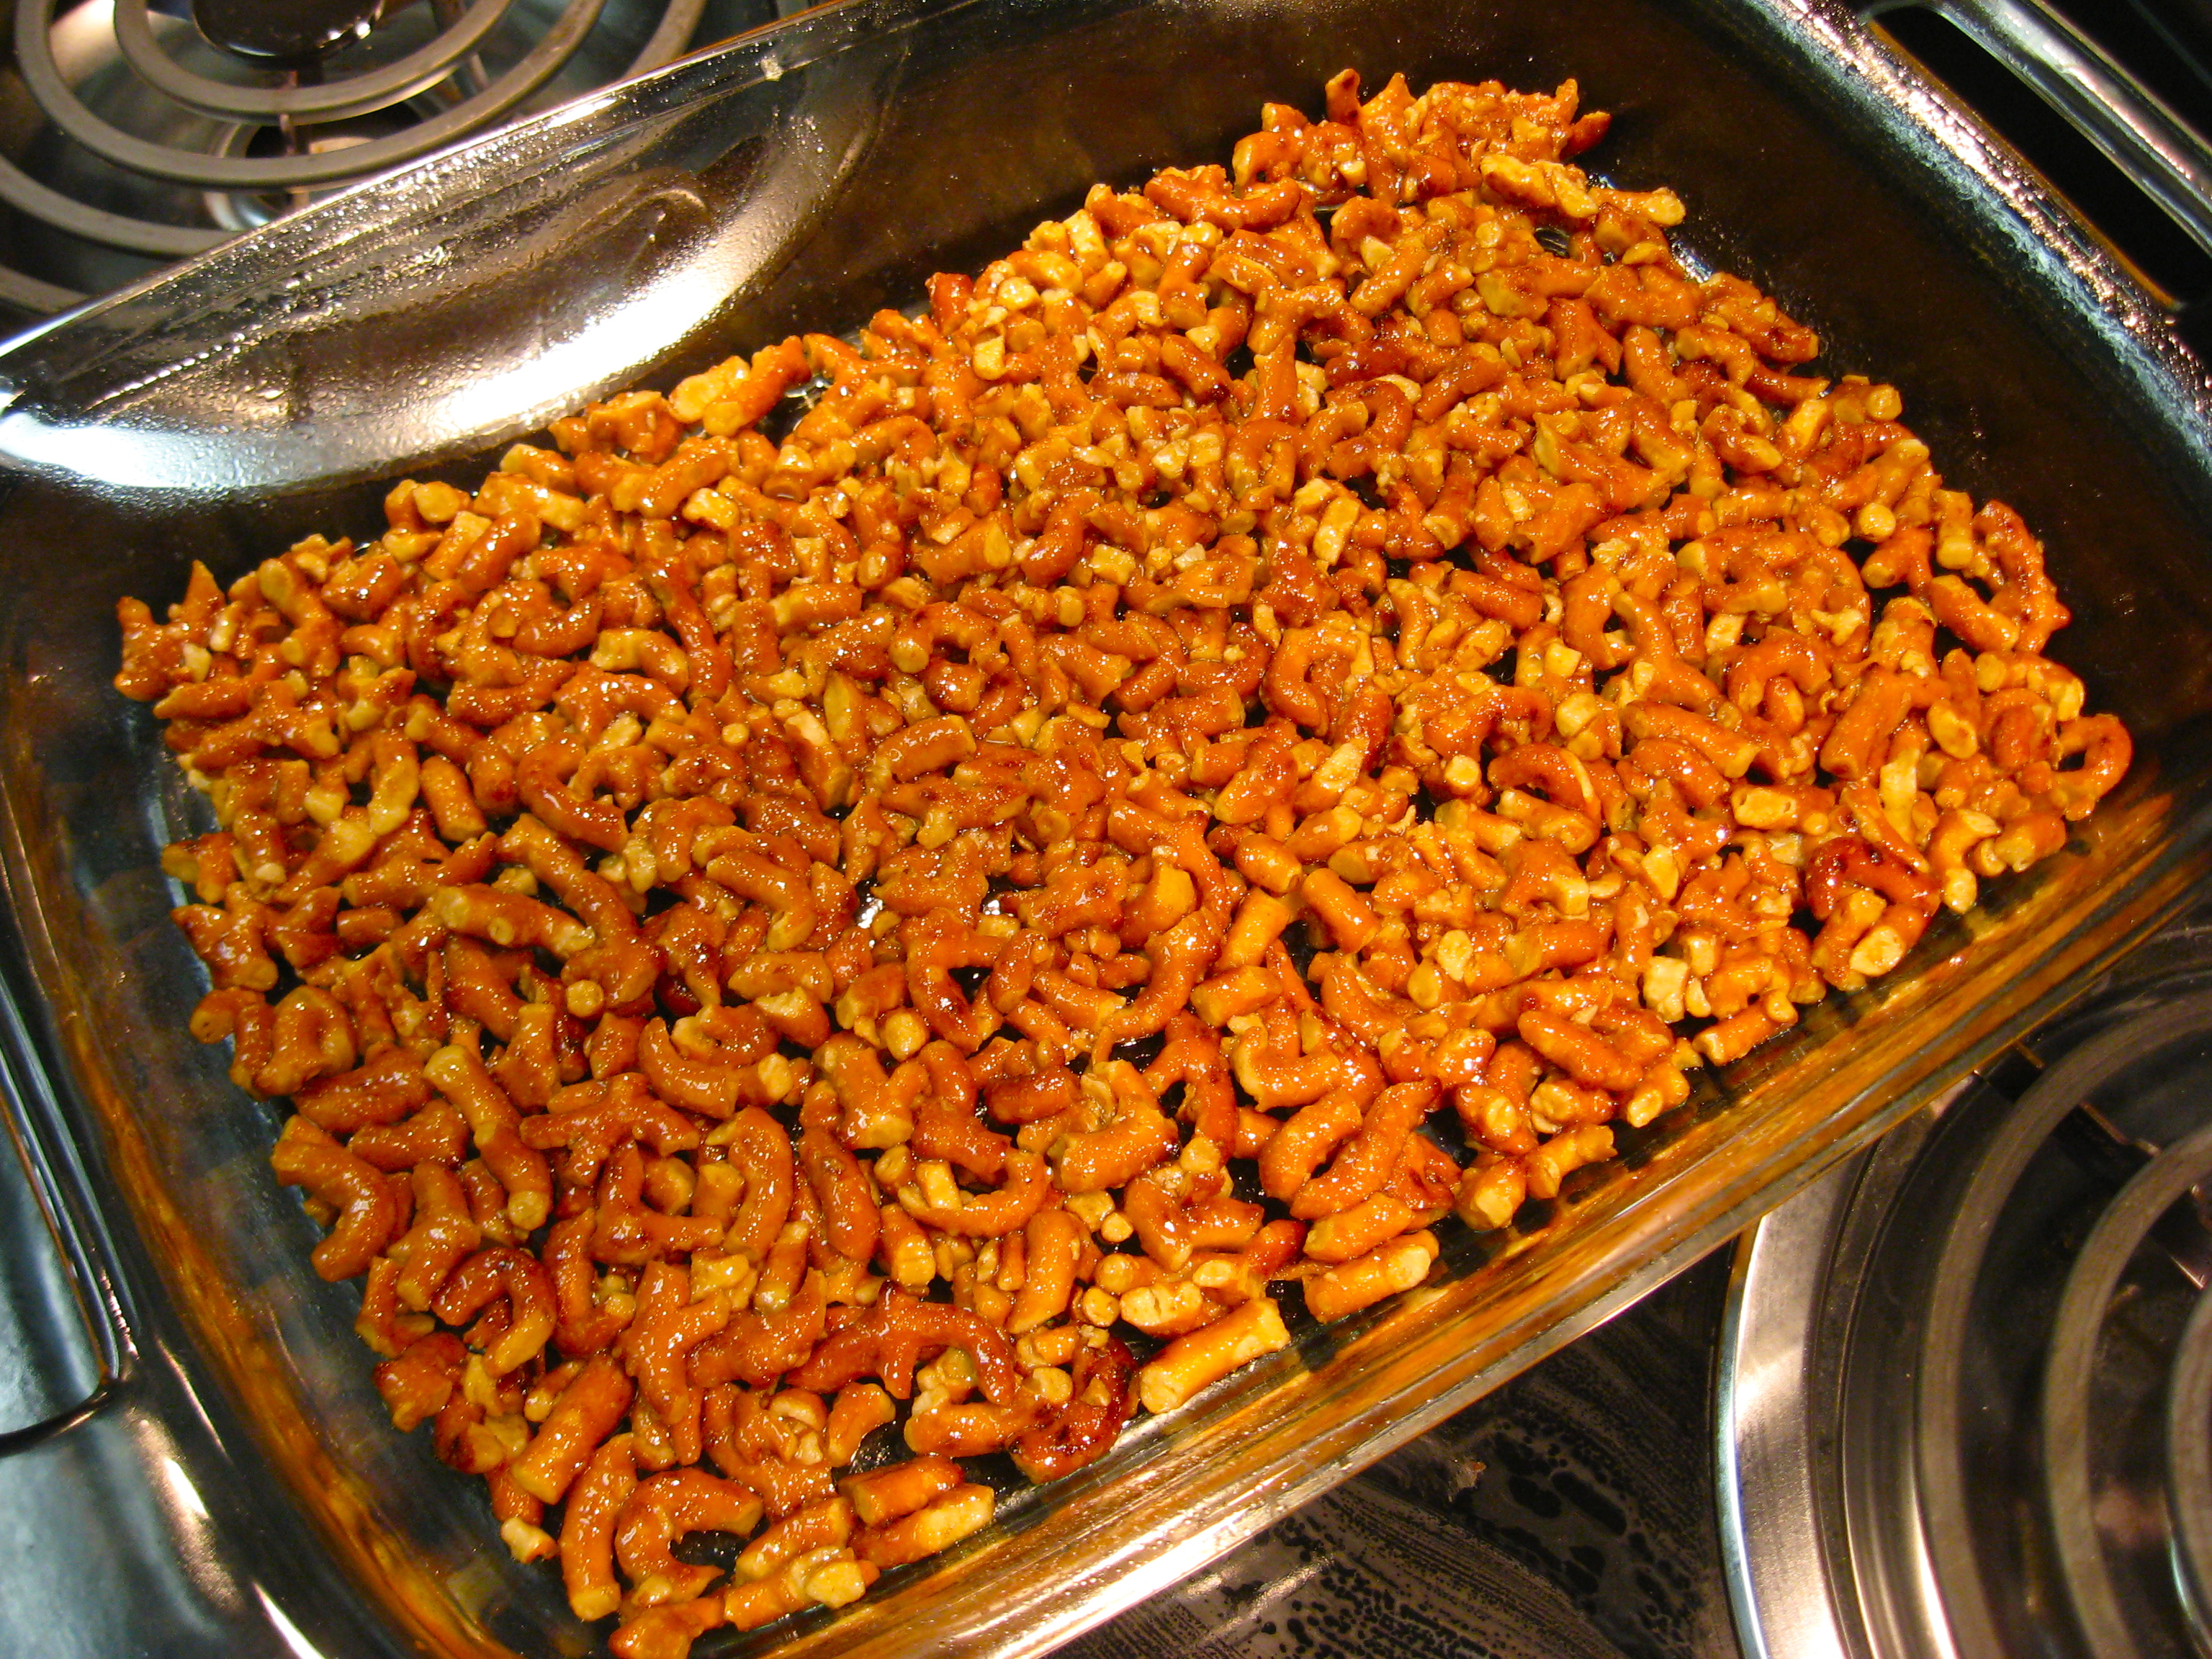
Pour the mixture into a 9X13 baking dish (I usually spray it lightly with Pam) and then use the back of a wooden spoon to pat the pretzels down into an even layer. It should look like this:

Pretzel Crust

Pretzel Crust

Cook at 350° for 10 minutes. Let it cool completely (no refrigeration) before putting on the next layer. Let me just say, this crust is to die for. If this came in candy bar form, I’d be in trouble!

For the middle layer, you’ll need:

  • 8 oz cream cheese, softened
  • 1 cup sugar
  • 9 oz Kool Whip (French Vanilla is the best!)

Combine the sugar and cream cheese first. Once they are well-mixed, fold in the Kool Whip.

Don't over mix!

Don’t over mix!

When the pretzel crust is cool, spread the cream cheese mixture over it. Make sure to seal the edges of the dish; this prevents the jello from seeping through the layers.

For the Jello layer, you’ll need:

  • 6 oz flavored Jello (in this case, Peach)
  • 2 cups pineapple juice
  • 20 – 30 oz frozen or canned fruit (in this case, sliced peaches)

To make Strawberry Pretzel Jello Salad, use 20 oz of frozen strawberries from the freezer section and Strawberry flavored Jello. For my Peach version, use two 15 oz cans of sliced peaches in lite syrup and Peach flavored Jello. Drain all the liquid from the peaches and cut them into bite size pieces. Then, let them sit in the freezer while you prepare the rest of the Jello layer.

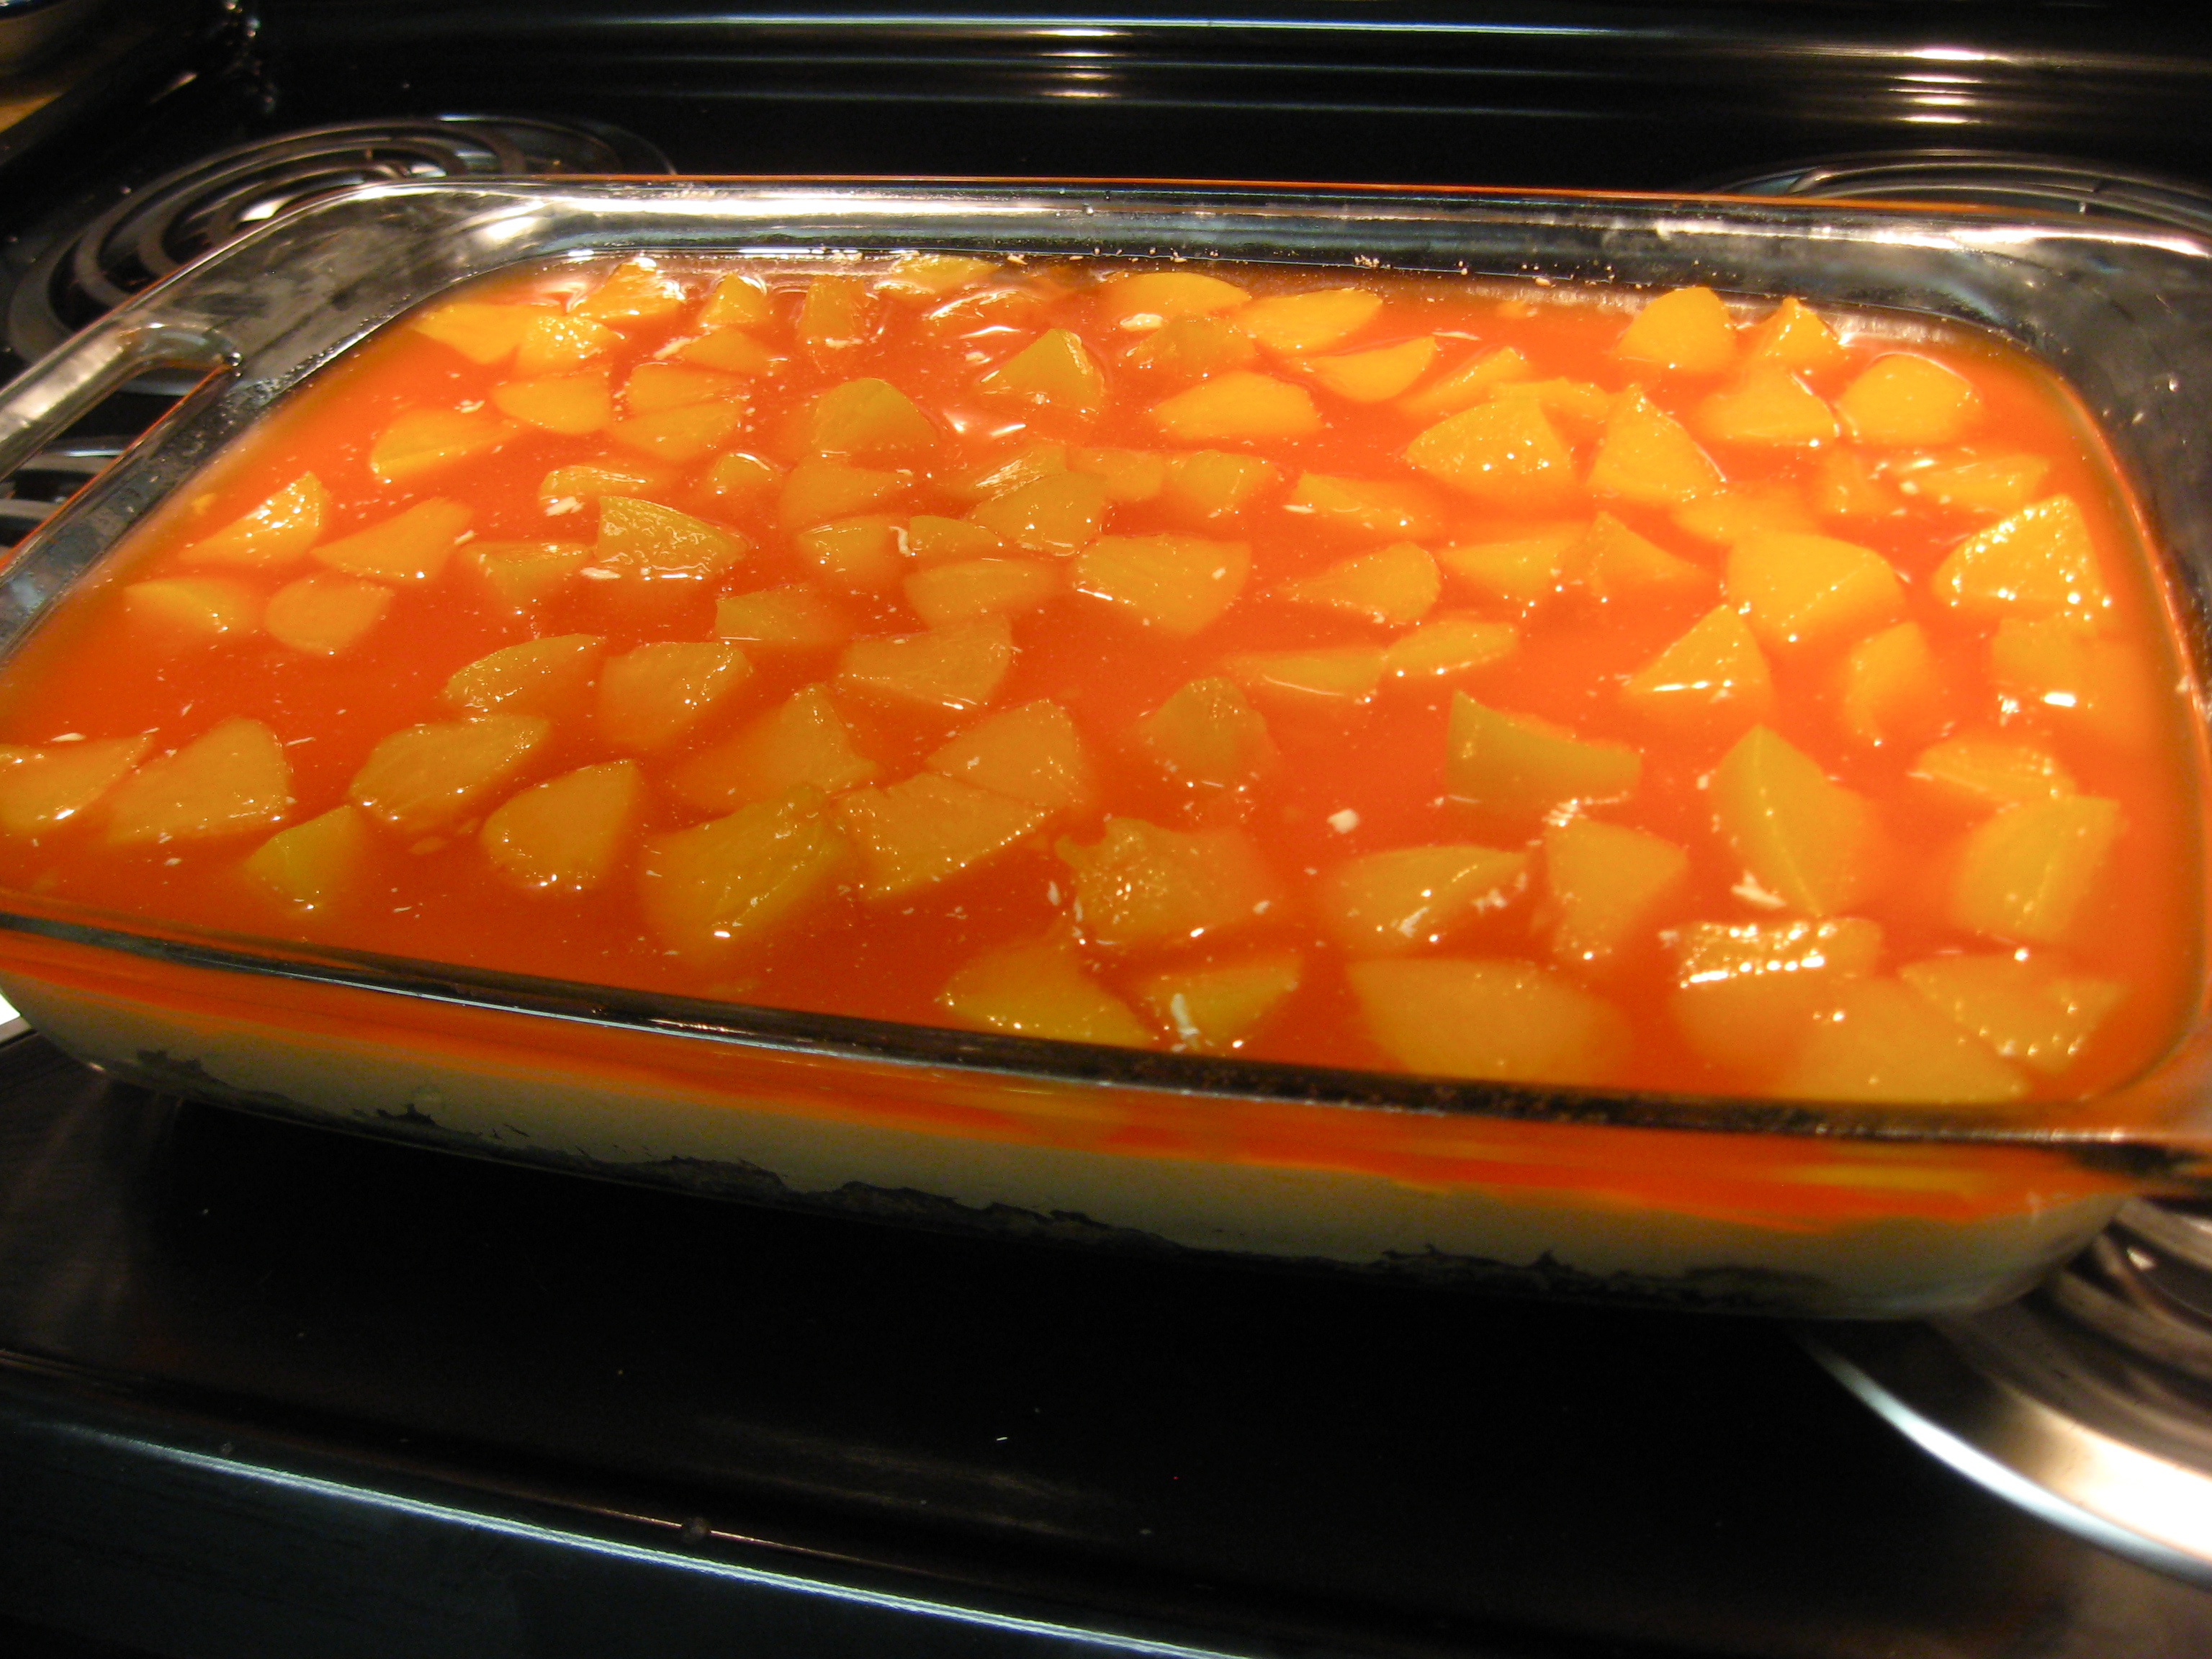
Microwave the pineapple juice for about 3-4 minutes. In a large mixing bowl, combine the hot juice and Jello. Stir until dissolved. Then add the chilled peaches (or fruit of your choosing). Depending on how the Jello sets, you may need to pop the bowl in the refrigerator for 5 minutes. When the Jello starts to thicken, pour over the top of the cream cheese layer. And make sure the fruit pieces are evenly distributed across the top.

Jello Layer

Jello Layer

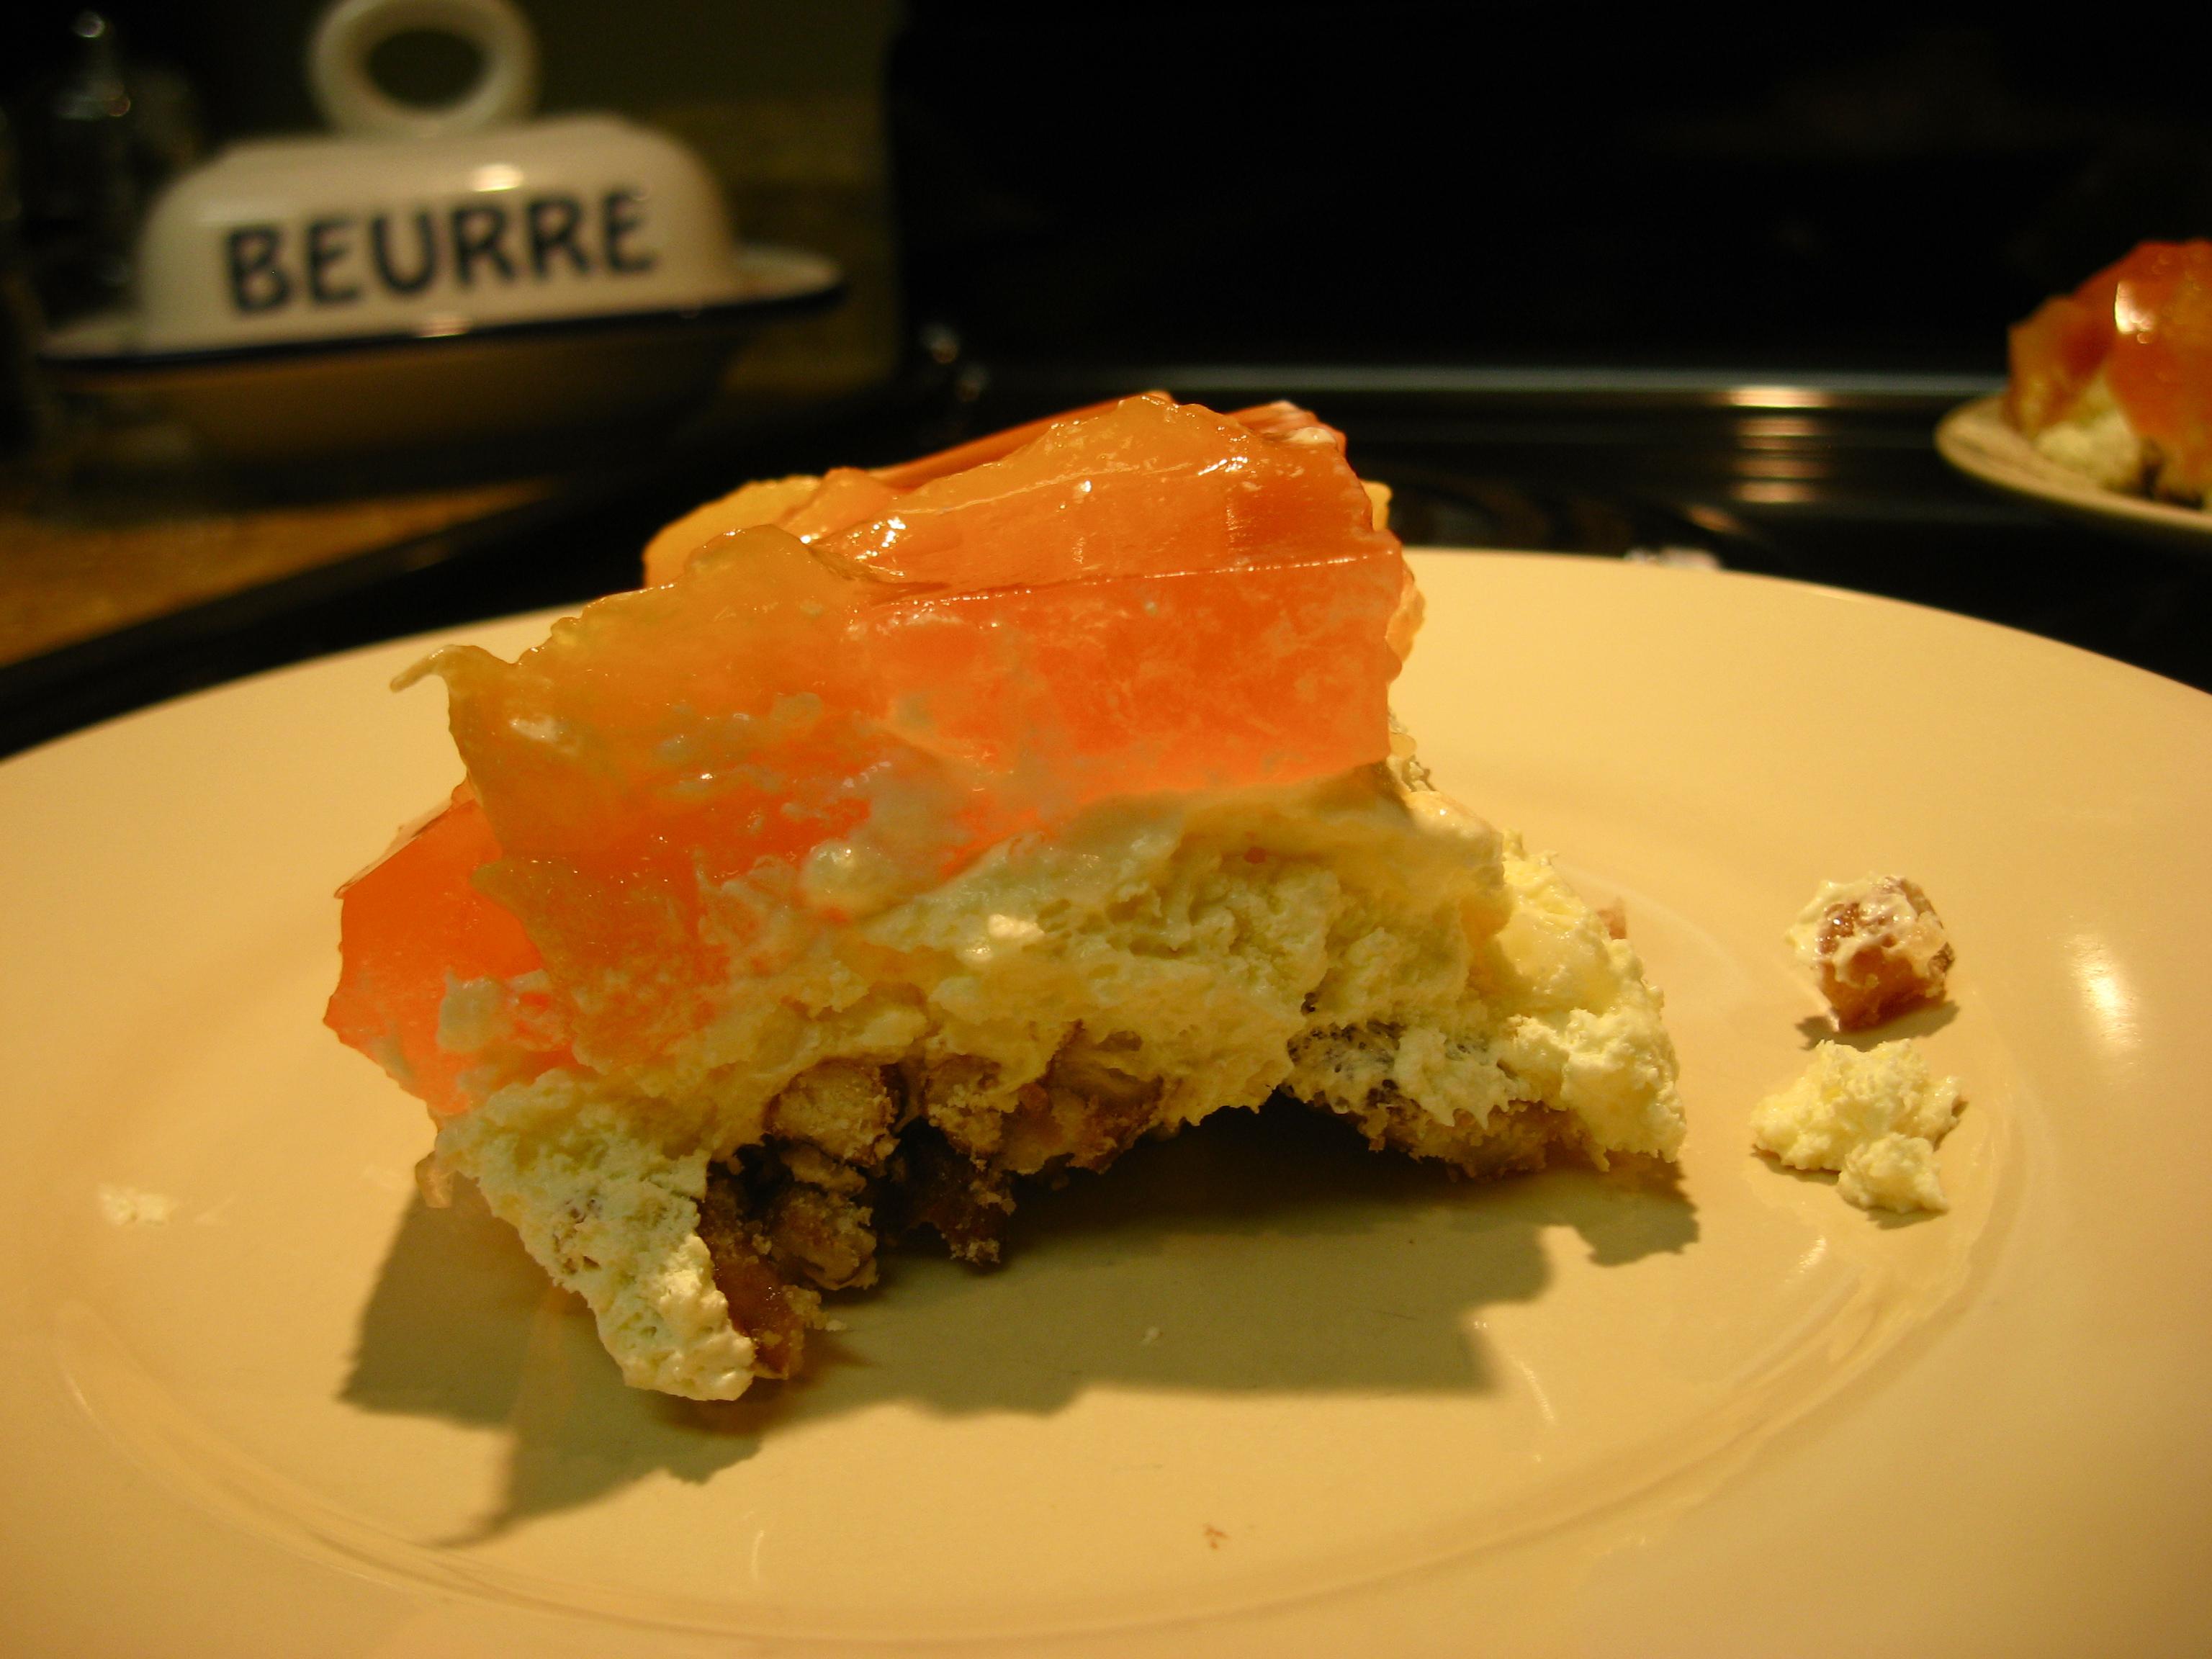
After that, it’s the waiting game! Let the dessert set in the refrigerator for a few hours. Cutting the slices is a bit of a wrestle because of the caramelized pretzel crust, but it is soooooo worth it! And it may not come out pretty, but your taste buds won’t care!

Peach Pretzel Jello Salad

Peach Pretzel Jello Salad

Jello Fruit Snacks

I love fruit snacks!!! Always have, always will. So, when I saw this recipe from Six Sisters Stuff for DIY Jello Fruit Snacks on Pinterest, I couldn’t resist adding it to my Pinterest Challenge!

Here is what you need: whisk, saucepan, liquid measuring cup, rubber mold, unflavored gelatin, flavored Jello, and water.

Jello Fruit Snack Supplies

What a lovely coincidence that Valentine’s Day is coming up, and I just happened to own some heart shaped ice cube molds from IKEA that I have only ever used once! ♥

I used the Knox brand of unflavored gelatin which is packaged in small envelopes. You just need one package of Jello, but I selected my four favorite flavors of Jello to make several versions.

Recipe:

  • one (3 oz) package Jello, any flavor
  • two (.25 oz) envelopes unflavored gelatin
  • 1/3 cup water

Sprinkle the gelatin over the water in a small saucepan. Heat over medium heat and stir until gelatin is completely dissolved. Pour into molds and allow to set at least 20 minutes.

It seems like a very small amount of water, but it will all mix together and dissolve. Just keep whisking. And whisking. 🙂 Use a small spoon to fill the tray. I only filled the hearts halfway and came out with 20 fruit snacks, about one and a half trays. The trick here is to work quickly. If you pause too long, let’s say to take pictures for your blog, the last few spoonfuls will be mighty goopy!

So, was this a WIN or a FAIL?

Six Sisters Stuff's fruit snacks.

Six Sisters Stuff’s fruit snacks.

Shiny Happy Peebles' fruit snacks.

Shiny Happy Peebles’ fruit snacks.

I’d say a WIN! Flavor-wise, they taste really yummy. I think if I had cooked them longer, they might have become clearer, but in my opinion, they don’t look half bad! 🙂

Except for this one.

This actually looks like a human heart. Gross.

This one actually looks like a human heart.

Update: I made the other flavors and tried cooking them a little longer; definitely improved the look and the texture!

Strawberry, orange, grape, and watermelon!

Strawberry, orange, grape, and watermelon!